

.svg.png)


Manage tables
Insert items related to your main context in the form of tables
We're going to go through 3 simple steps to achieve this:
- Création de plusieurs tableaux dans un document
- Filtrer ces tableaux pour afficher uniquement la donnée pertinente
- Trier les tableaux par le critère de son choix
Prerequisites
✓ Have a template ready with the main object configured
✓ Choose a use case where the main object has related items (e.g., Opportunity, Quote, Account...)
Why do tables?
What is a Gonexa "Child object"?
A table corresponds to an associated list in Salesforce. For example, if I am on an account, the contacts are children of that account. If I am on an opportunity, the opportunity products are children of the opportunity.
These relationships can be standard or built via custom fields. Gonexa technology simply allows you to display information related to your context.
Create tables
For example
Many use cases are possible, such as displaying products, services, and options linked to a sales opportunity, or lists of contacts linked to accounts.
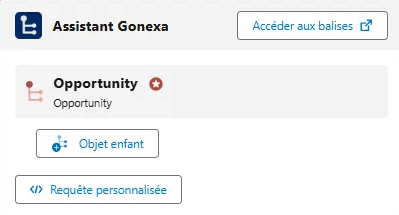
- In your document template, go to the Gonexa Assistant component
- Click on “+ Child object”
- Select the Salesforce object linked to your context (ex: Opportunity products linked to the opportunity)
- Rename the tag label correctly if you want to have several tables on the same child object
Tip
Renaming the tag label will help you distinguish between your tables and ensure you add the correct tag to the right table when building your template. - Click on “Create”
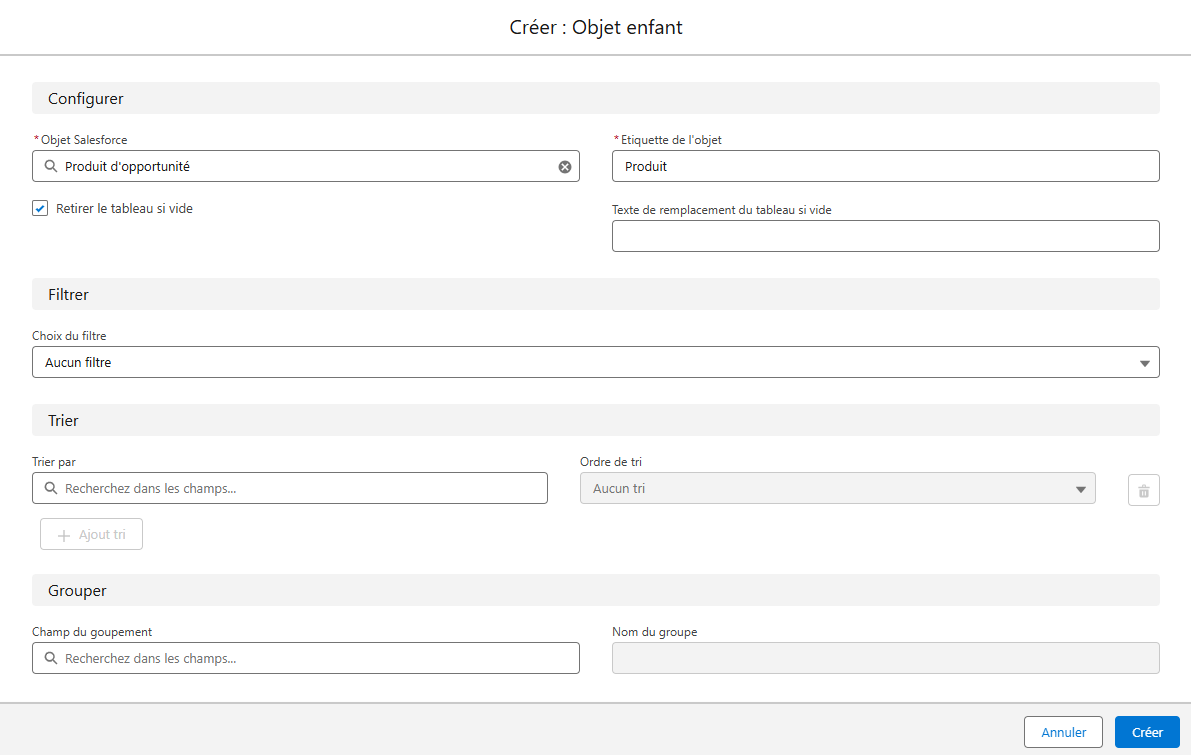
- Repeat the operation several times with a correctly named label each time (ex: Label #1 = Product, Label #2 = Service, Label #3 = Option”)
For example
You can create 3 child objects on the same Salesforce object, such as Opportunity Products, with one labeled "Product", the second "Service", and the third "Option". - We end this part by clicking on “Access tags” in order to facilitate the insertion of tags in the final document.
Note
1 Child object = 1 table in the document. Create as many child objects as you wish to have distinct tables in your document template.
Inserting tables in Word
Tip
This step is based on standard Word tables. For simplicity, feel free to use our pre-designed templates
- Insert a new table with 2 rows and the number of columns of your choice
- The first line will allow you to have the names of the columns, name the columns as you want
- On the 2nd line, we are going to use the Wizard that we opened earlier to put the tags
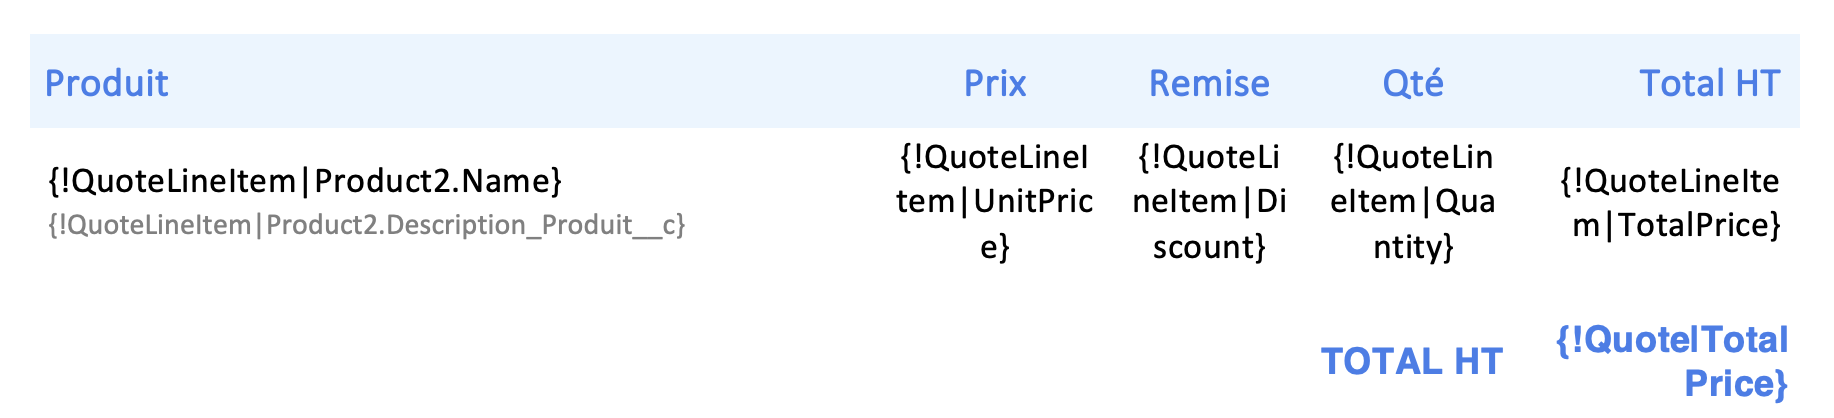
- Click on the desired child object and look for the field according to what you want to put in your table
- Finalize the template with all the fields you want to see displayed
Note
Tags for a child object must be placed inside a table. If they are outside, they will not appear when the document is generated.
To make it easier to understand, you can download the template shown during the demonstration below:

- Go back to Salesforce and upload the Word template with the tables by clicking on “Upload version”
- Make sure you have a test record with children
- Test the generation to see the final result
Filter data
Filters ensure that you only see data that is relevant to your context. Here, we want to filter only the “Product” category in the 1st table, the “Services” in the 2nd, and the “Options” in the last. We use the same Salesforce object 3 times but with different views.
For example
Here, we want to filter only the "Product" category in the 1st table, "Services" in the 2nd, and "Options" in the last. We are using the same Salesforce object 3 times, but with different views.
A good understanding of your Salesforce setup is essential to identify the correct filter to use, ensuring it is populated with the right data.
- If the field that can filter the data has not yet been created, you must create it and ensure that it is populated.
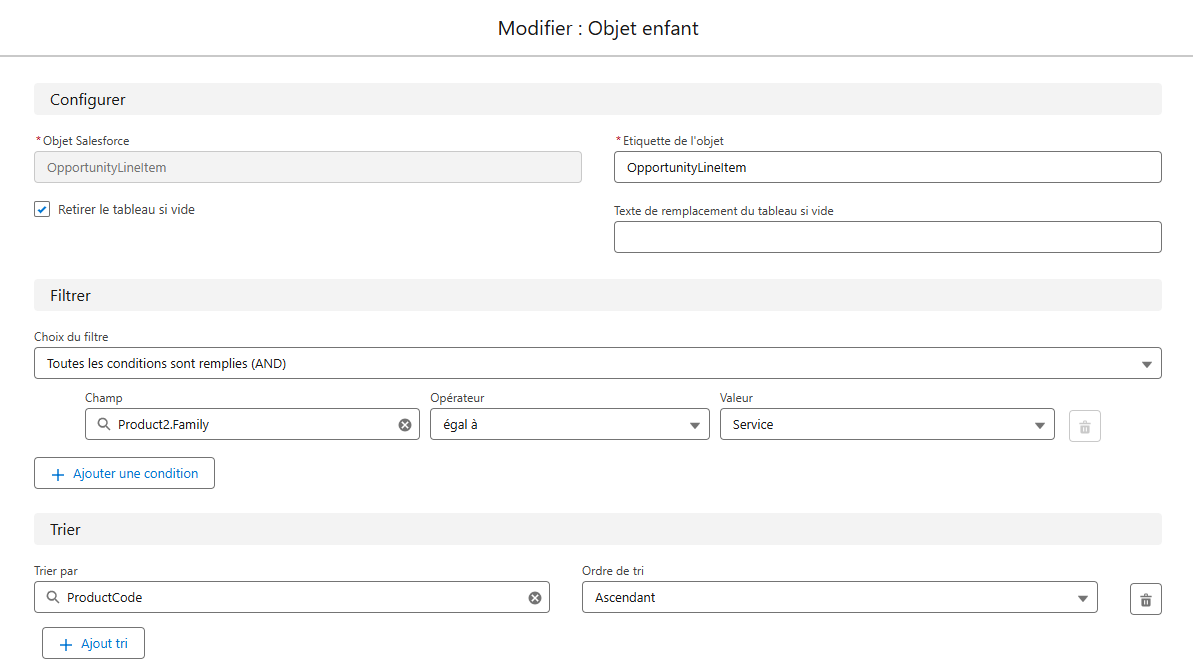
- In the Gonexa Assistant component, edit the child object by clicking on the pencil
- In the “Filter” section, add a record retrieval filter
- Find the field to use for the filter
For example
Product Family = "Options"

- Go back to your context (Quote, Opportunity,...)
- Make sure you have completed data on the filtered field
- Generate to verify that the filter has been applied
Sort data
This step is optional since it will simply improve the organization of the data in your table a bit at the time of generation.
- Same as for the filter, you need to identify the right field that will allow us to sort dynamically
- Go back to the child object you want to sort
- In the “Sort” section, specify the field you want to sort with
- Choose sorting order from Ascending or Descending
- Example: ascending sorting of the ProductCode field
For example
Sorting by the ProductCode field in ascending order will sort the products
- Go back to your context (Quote, Opportunity,...)
- Make sure you have the data filled in on the sorted field
- Generate to verify that the sorting has been applied
Grouping data
Group all the elements of a child object that correspond to a criterion, that is, group the rows of a table in a Word document according to a Salesforce field such as the family of a product for example.
From the child object of your document template:
- Go back to the child object you want to group
- Choose the Salesforce field to group on. It can be an object based on the child object or on a parent object of the child object.
For example
Product2.Family - Name the field “Group Name” in any way you want.
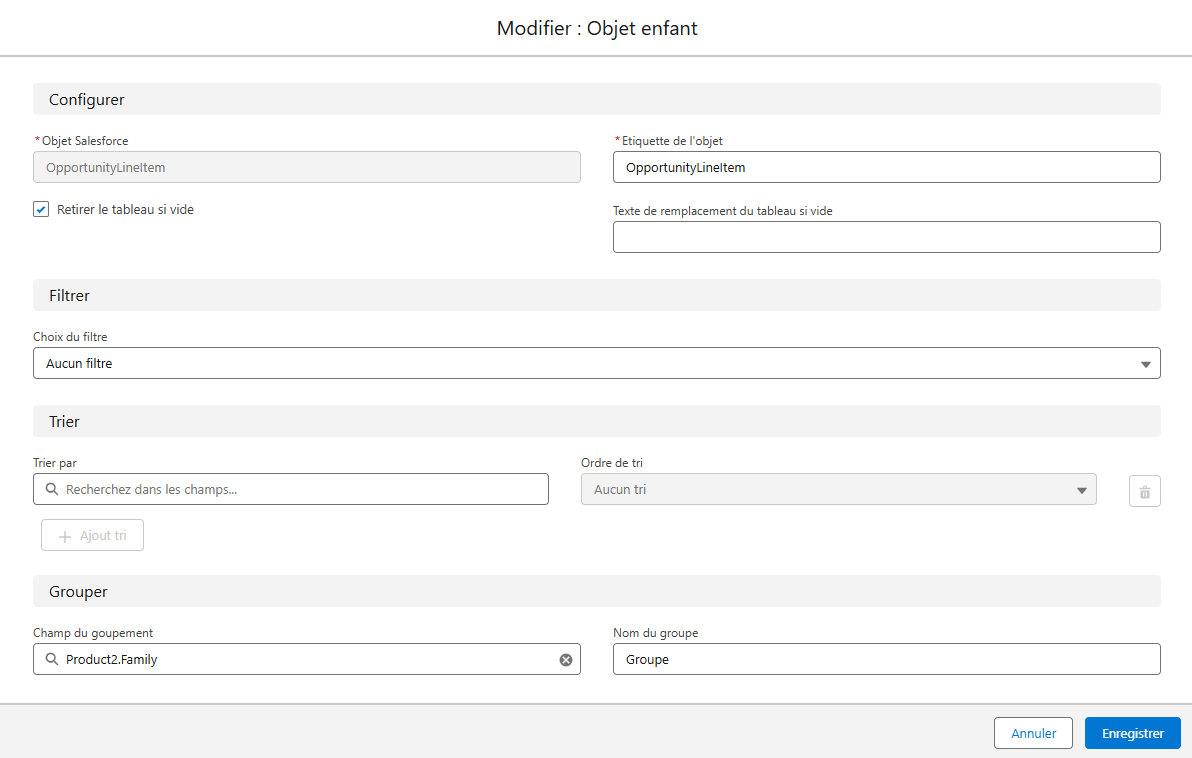
From your document template, build your table using one of the following two methods.
If you do not need to repeat table headers across multiple tables, this method is recommended as it is the simplest.
- From your Word document template, create a table with one column and two rows, with the first row containing the name of the group.
For example
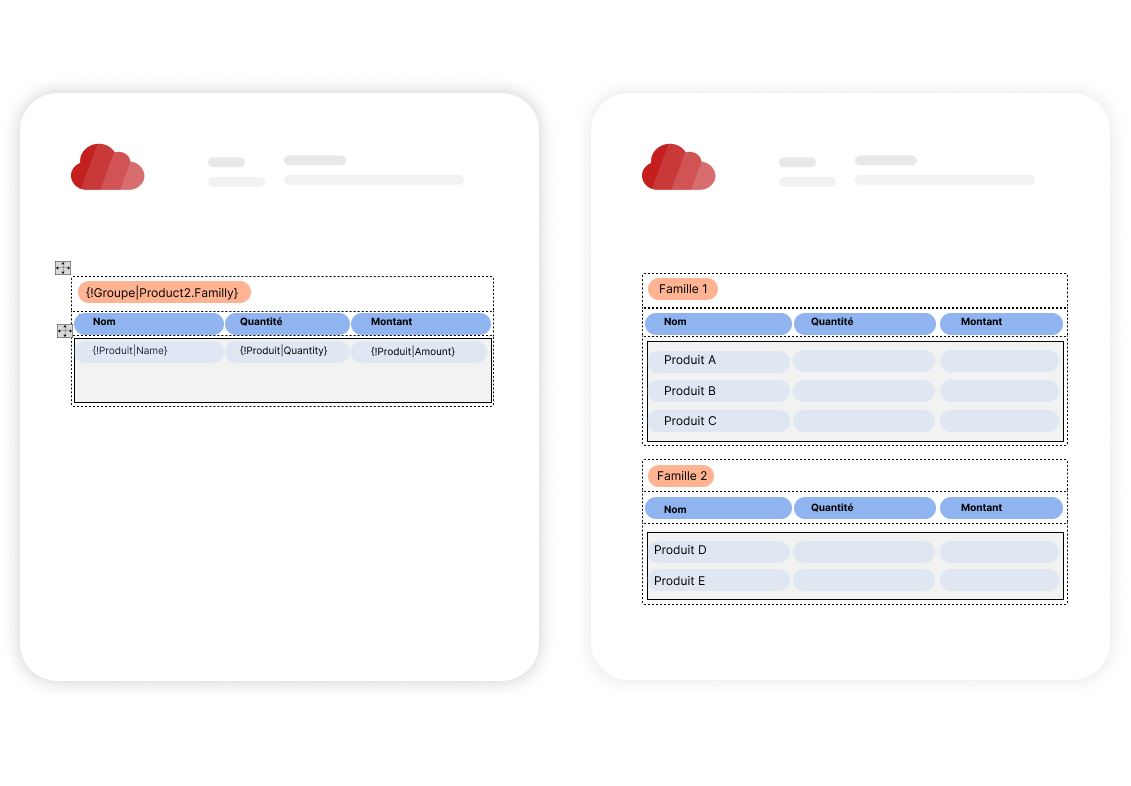
The first row of the table will contain the following tag {!Group name | API name of the field to group by}, which in our case is {!Group|Product2.Family} - In the 2nd row of the table, insert the entire table. (Header, columns, and rows) containing child objects
- Adjust borders and columns to suit you using Word formatting.
Download an example template
If you want to manage table header repetition across multiple pages, you must use this method. The entire table will be repeated based on the number of results that match the criteria, with the family name in the header.
- From your Word document template, create a table with one column and three rows, from which, in the first line, you will fill in the grouping tag.
For example
The first row of the table will contain the following tag {!Group name | API name of the field to group by}, which in our case is {!Group|Product2.Family} - In the 2nd row of the table, split the cell according to the number of columns you want
- In the 3rd row of the table, insert the table of your child object containing the child tags, adjusting the columns as well as the borders. You can also change the properties of the table by choosing the value “Around” as “Text wrap”.
Word configuration vs Generation result

Download an example template
